Carpathian trip planner: how to plan your route, overnights and a PDF plan

A trip to the mountains usually starts with a dozen browser tabs: the trail on one site, the place to stay on another, the drive in a navigation app, and the times and distances added up in your head. Karpaty.rocks now has a trip planner. You tap the heart on the places you like, and the site turns them into a plan: how long you drive, how far you walk, where you sleep and how many days it takes. You can see the plan on a map, download it as GPX, print it as a PDF and send it to friends as a link.
Below we show how it works with a real example: a weekend from Lviv to Yaremche and Hoverla. Every number in this article comes from the planner itself.
What the planner does
- puts towns and villages, trails, places to stay, peaks and sights into one list;
- between neighbouring stops it calculates a car leg (or an on foot leg if the next place is less than 1.5 km away);
- takes you to the start of a hiking trail and then on from its finish; for a loop trail that is the same point;
- treats a place to stay in the middle of the plan as an overnight: the next day starts after it;
- shows totals (km at the wheel, km on foot, ascent, days) and warns you when something in the plan is worth checking;
- exports the plan: map, GPX, PDF, link.
No sign-up is needed. The plan is kept in your browser, so the easiest way to open it on another device is the «Share» link.
Step 1. Add places with the heart
The heart is on the pages of towns and villages, trails, places to stay and sights. On a computer it sits next to the title, on a phone on the photo. We started with the Lviv page, because that is where we set off from.

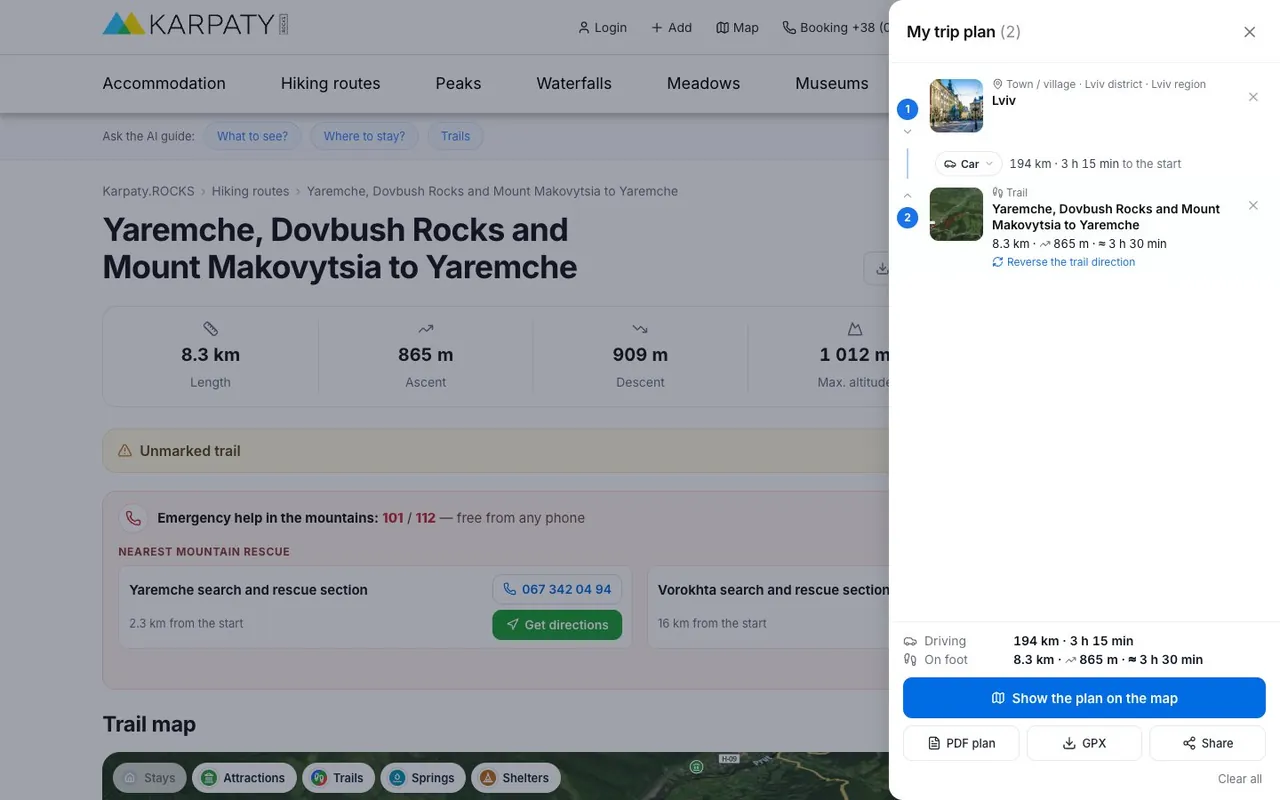
After the first heart, the «My trip plan» panel opens on the right. Next we add the trail «Yaremche, Dovbush Rocks and Mount Makovytsia to Yaremche». The plan immediately shows its length, ascent and time: 8.3 km, 865 m, about 3 h 30 min. The leg from Lviv shows the drive: 194 km and 3 h 15 min by car to the trailhead.
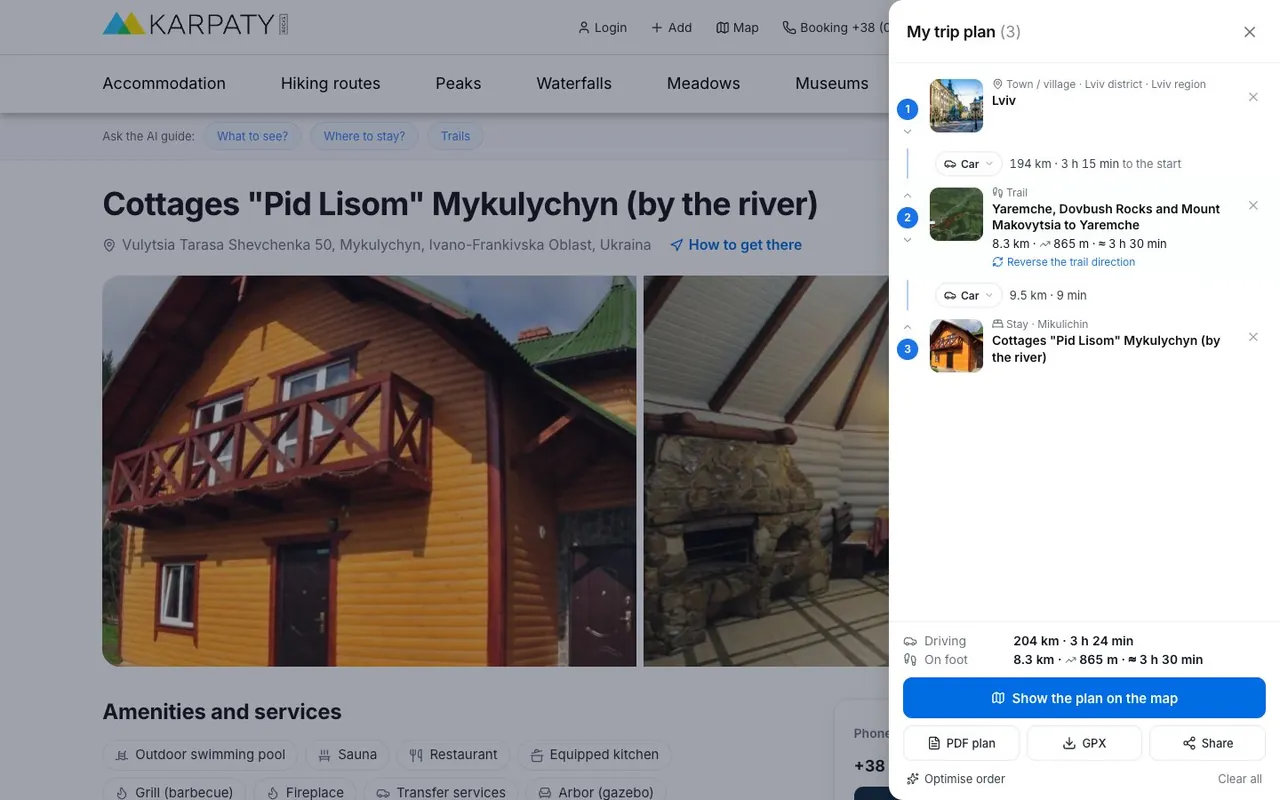
A place to stay is added the same way. We chose Cottages «Pid Lisom» in Mykulychyn: about 10 minutes by car from Yaremche and a convenient base for Hoverla.
Three more hearts: the Probiy waterfall in Yaremche, the loop «Zaroslyak base, via Mount Hoverla and Hoverla Waterfall» and the Austrian viaduct bridge in Vorokhta on the way home.
Step 2. Set the order and look at the days
The plan follows the order of the places. Changing it is easy: drag a place by its number or tap the ↑ ↓ arrows next to it. We added the Probiy waterfall last and then moved it up to third place with three taps, right after the Makovytsia trail.
Here is the result:
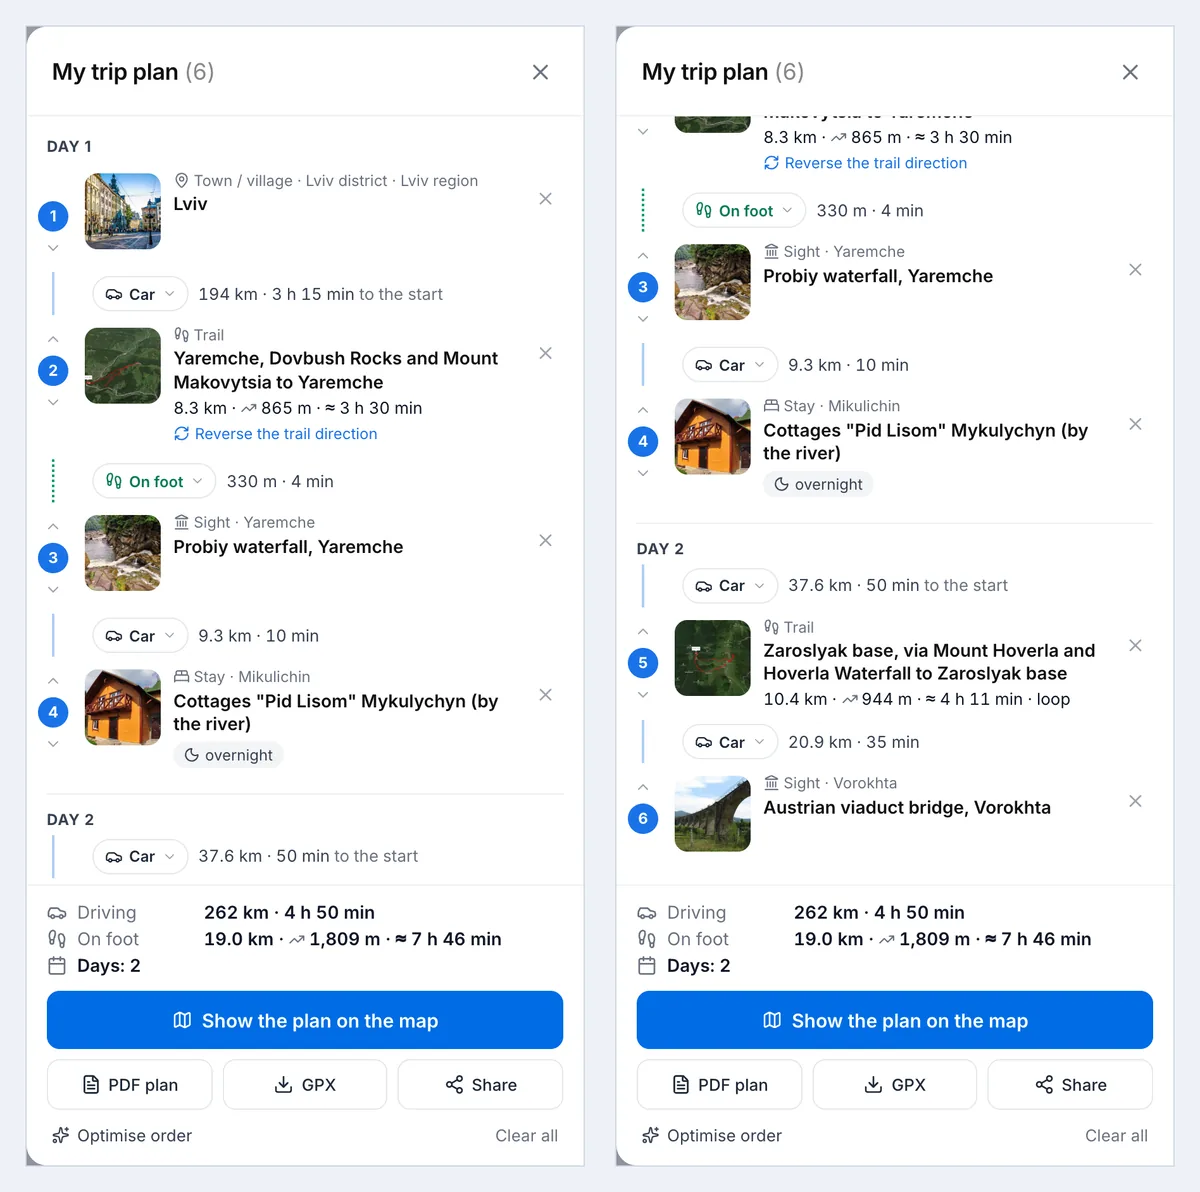
Day 1. Lviv → 194 km by car (3 h 15 min) to the trailhead in Yaremche → the trail via Dovbush Rocks to Makovytsia: 8.3 km, 865 m of ascent, about 3 h 30 min of walking → 330 m on foot (4 min) to the Probiy waterfall → 9.3 km by car (10 min) to the cottages in Mykulychyn. The place to stay got an «overnight» label, and everything after it moved to the next day.
Day 2. 37.6 km by car (50 min) to the start at the Zaroslyak base → the loop via Hoverla and the Hoverla waterfall: 10.4 km, 944 m of ascent, about 4 h 11 min → 20.9 km by car (35 min) to the viaduct in Vorokhta.
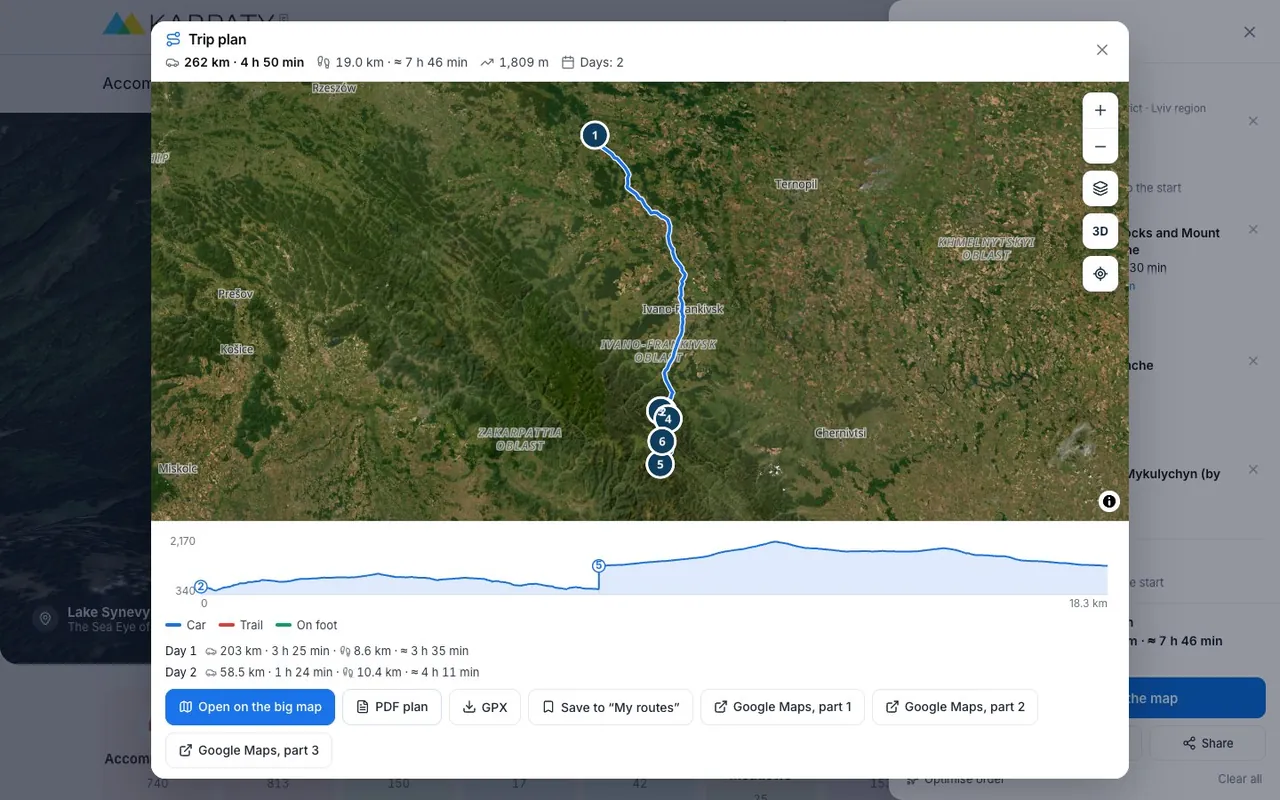
In total: 262 km and 4 h 50 min at the wheel, 19 km on foot with 1,809 m of ascent and about 7 h 46 min of walking, 2 days.
Look at the leg from the trail to the waterfall: the planner chose «On foot» by itself, because the trail finishes 330 m from Probiy. You can change the mode on every leg: tap «Car» or «On foot», and the distance and time are recalculated.
Each trail has a «Reverse the trail direction» button. It swaps the start and the finish, and the planner recalculates the drive to and from the trail. Walked the other way, our Makovytsia trail has 909 m of ascent instead of 865 m.
The «Optimise order» button rearranges the places to make the total way shorter; the first place stays the start. Afterwards, check that the overnights are where you want them.
Step 3. Read the warnings
If something in the plan deserves attention, a yellow warning appears under the list. For example, we tried replacing our trail with another one, «Yaremche – Mount Makovytsia». It is one-way, and its finish is 3.2 km from its start. The planner reminded us right away: the car stays at the start, plan a transfer.
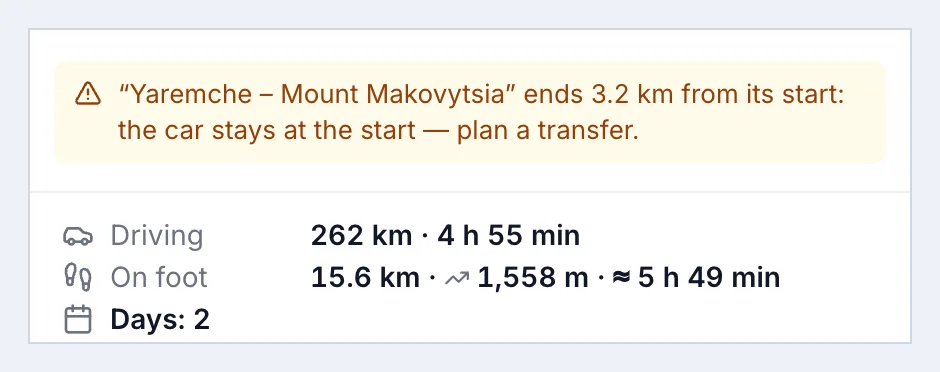
The planner also warns about a very long day (more than 11 hours of driving and walking) or more than 6 hours at the wheel, and about a place the road does not reach closely. These are hints, not rules: the plan is still yours.
Step 4. See the plan on the map
The «Show the plan on the map» button opens the whole route: the drive in blue, hiking trails in red, numbered stops, an elevation profile and totals by day. From here you can also open the plan on the big map, save it to «My routes» or open the drive in Google Maps. A long plan goes to Google Maps in parts, because hiking trails sit between the parts of the drive.
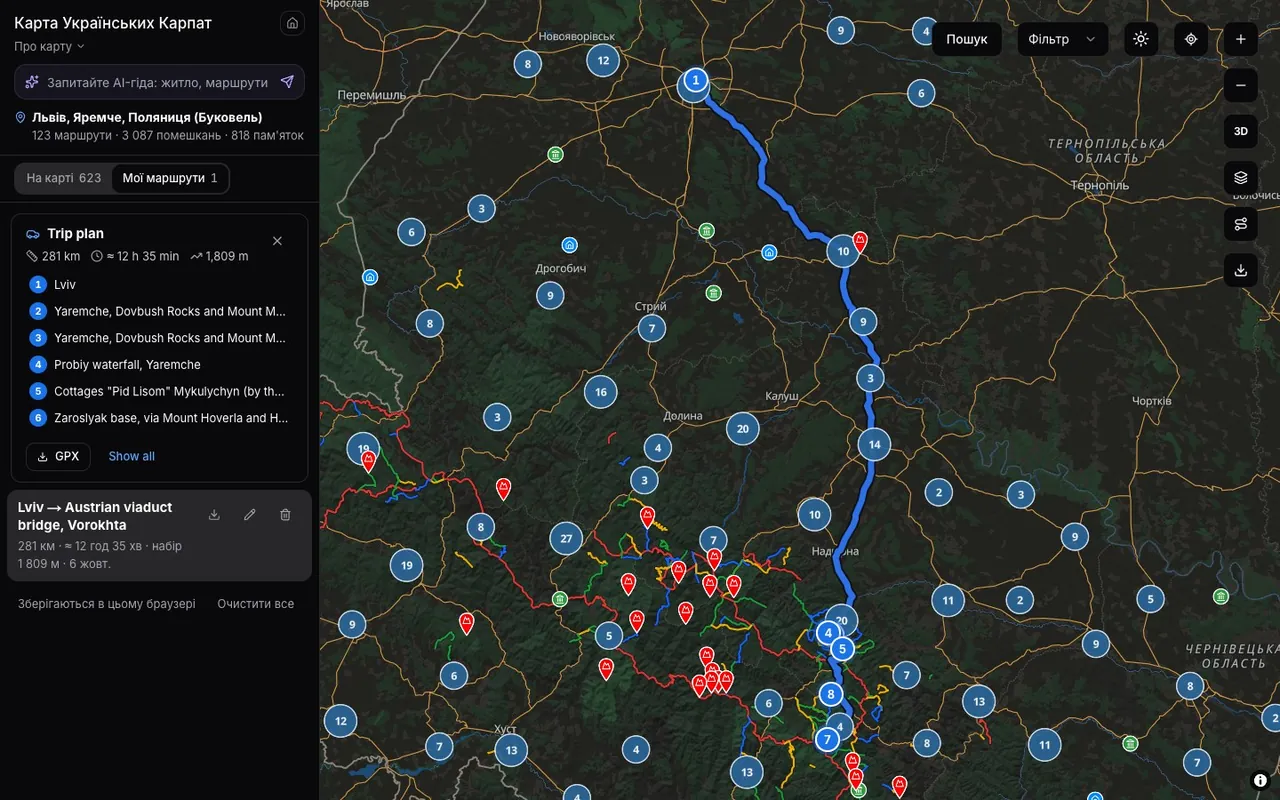
On the big map the plan is kept in «My routes», with the list of stops and a GPX button. Other trails, places to stay and sights around are visible there too, so it is easy to add to the plan.
The same on your phone
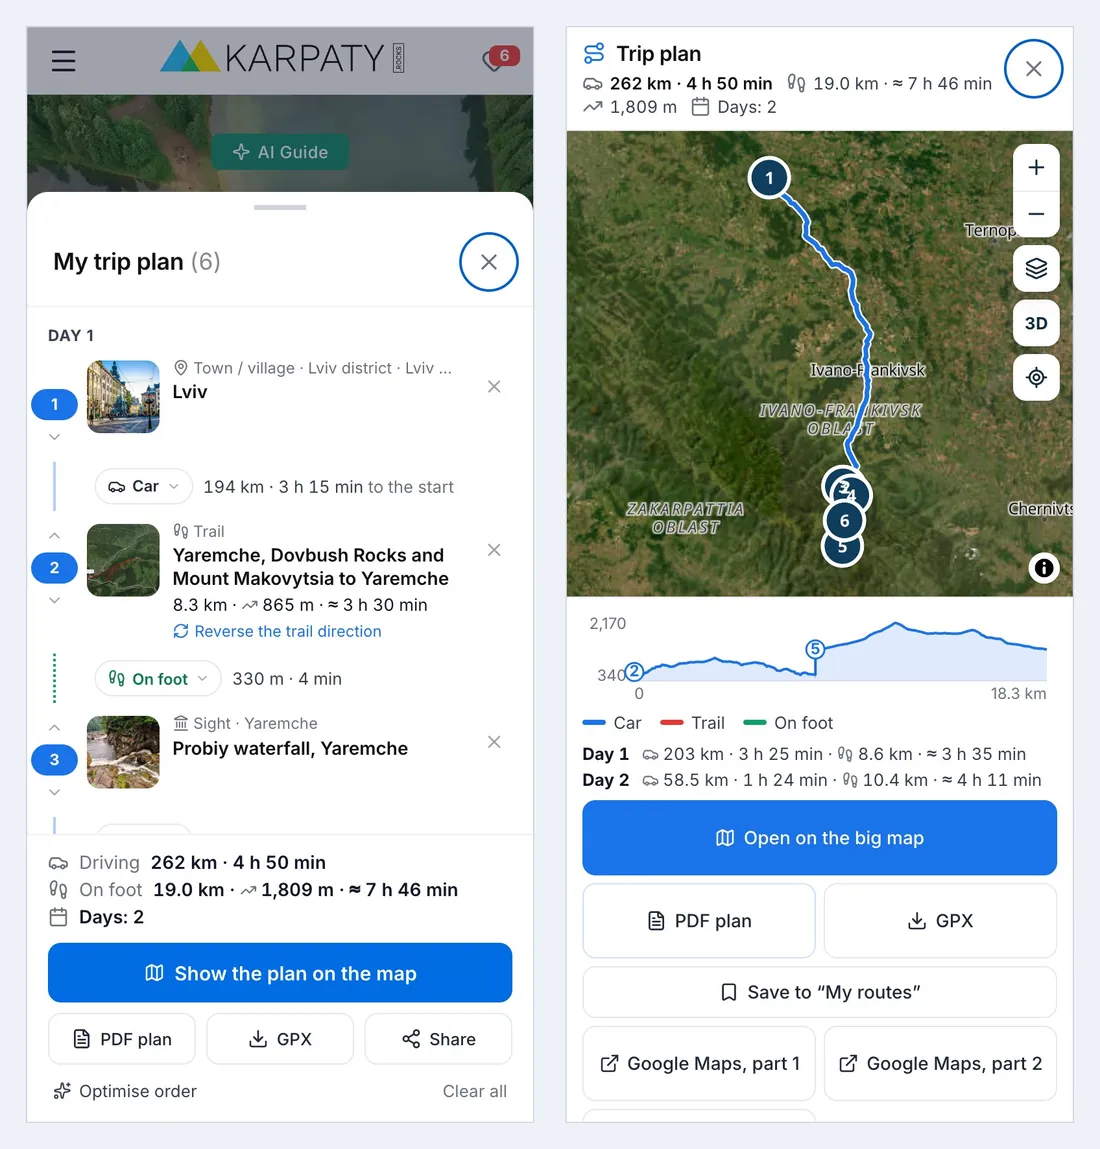
On a phone the plan opens as a panel at the bottom of the screen, and the heart in the header shows how many places are in the plan. Totals and buttons always stay at the bottom of the panel, so you can build a plan on the go.
Step 5. GPX, PDF and a link
GPX. The GPX button downloads one file for the whole trip: car legs as separate tracks, each hiking trail as its own track, and all stops as waypoints, with each trail's start and finish. The file opens in OsmAnd, Organic Maps, Locus, Mapy.cz or a Garmin device. Download it at home: there is often no signal in the mountains.
PDF plan. The «PDF plan» button opens a print page. You can give the trip a name and a start date, and the days get dates. For our example this made 8 A4 pages:
- a cover with a map of the whole trip, the totals and the list of stops by day;
- a page for each day: the day's map, the drive legs with navigation links, place cards with the address, phone and a QR code to the page on the site;
- for each hiking trail its own map, an elevation profile, what you will pass, water and overnight options, the best season and how to get there;
- a final safety page with the 101, 112 and 103 phone numbers.
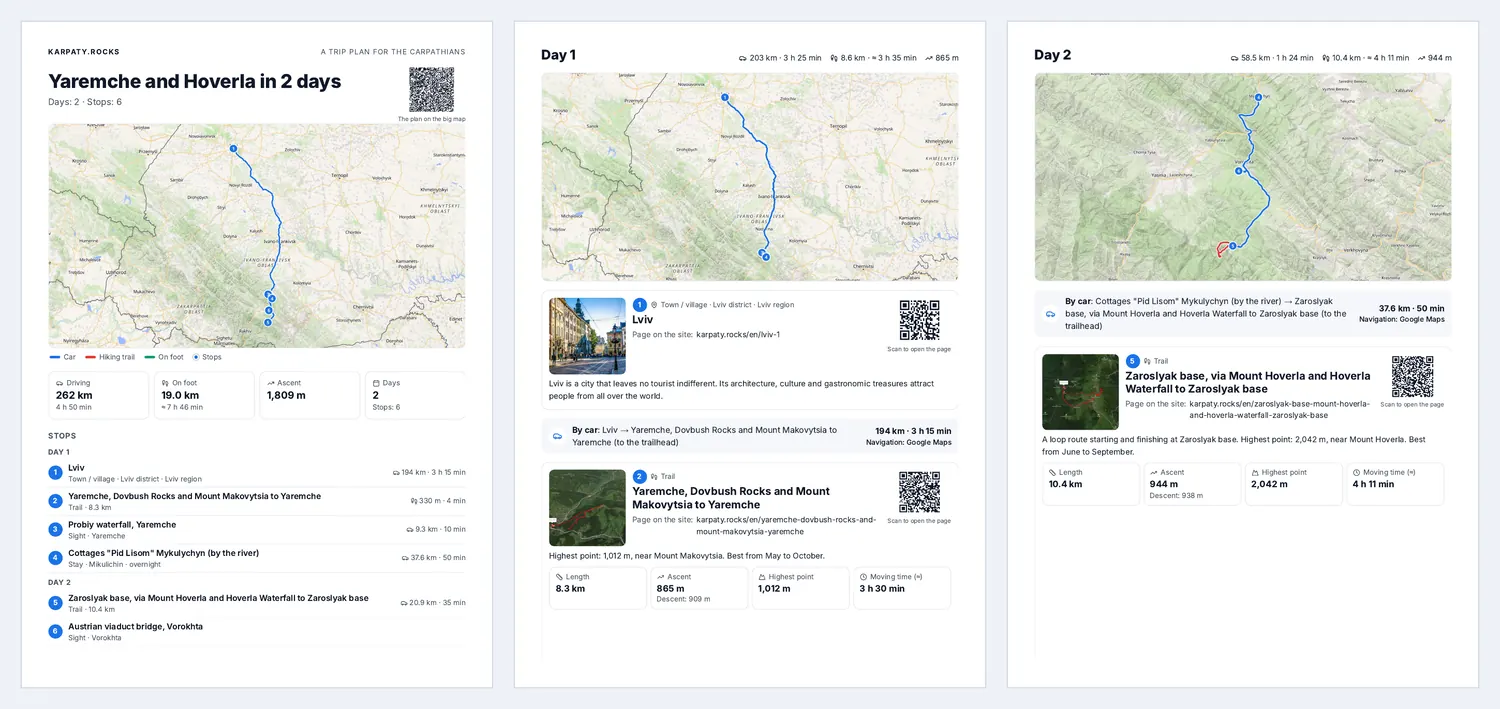
In the print dialog choose «Save as PDF». The text in the file is real text, so you can search it, and the links are clickable.
Share. The «Share» button copies a link to the plan (on a phone it opens the share menu). Whoever opens the link sees the same plan page and can add all the places to their own favourites with one tap.
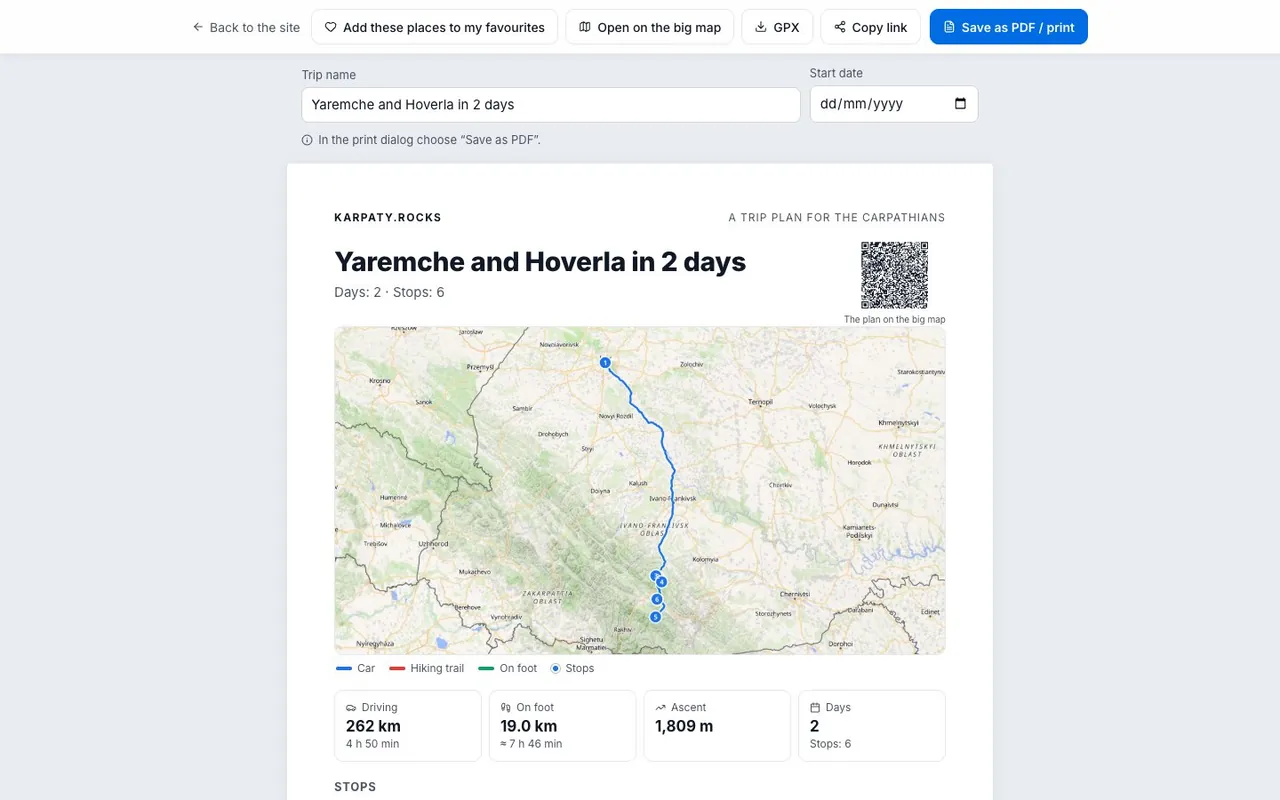
Try this plan
Open our example and make it yours: swap the place to stay, add another trail or switch the days around.
Open the «Yaremche and Hoverla in 2 days» plan
Or download the ready files: PDF plan (8 pages, 3.3 MB) and GPX track of the trip.
Tips for a good plan
- Start with where you set off from. Add your town first, and the planner will count the drive to the mountains too.
- Put places to stay between days. An overnight splits the plan into days. If a place to stay is the last stop, the planner treats it as the end of the trip.
- Check where a trail ends. A one-way trail with a car means getting back to the car. Choose loop trails or arrange a transfer; the warning will remind you.
- Times are estimates. This is moving time without stops (about 4 km/h plus an hour for every 600 m of ascent). Add time for rests, photos and weather. Day 1 of our example comes to about 7 hours at the wheel and on the trail without stops, so set off in the morning.
- Water. There are no springs on the Makovytsia trail, so take at least 2 l of water, as the plan itself suggests. The Hoverla loop has two springs, but you still need a supply.
- Season. Makovytsia is best from May to October, Hoverla from June to September. In winter it is a route only for experienced hikers with proper gear.
- Safety. Before you set off, check the forecast and tell someone your route and when you will be back. In an emergency call 101 (State Emergency Service of Ukraine) or 112. Contacts of the nearest mountain rescuers are on the mountain search and rescue units page. If the weather turns bad, turn back: the mountain will still be there.
The planner is new, and we keep improving it. If something is calculated oddly or a feature you need is missing, write to us. Have great mountains!
Comments
You may also be interested in
 Fishing in Western Ukraine: 7 Water Bodies Worth Visiting
 It's worth starting your acquaintance with the Carpathians from these ten authentic Carpathian villagesЯкщо бажаєте відвідати Карпати, але ще не вирішили, куди поїхати - ось десять гірських поселень, які не зможете забути.
 16 Simple Breakfasts for Hiking in the MountainsЯкщо ви любите добре поснідати, похід на природу - це не причина харчуватися тільки консервами. Цілком можливо приготувати смачний...